Ubuntu开发Struts2应用(6、整合hibernate和spring)
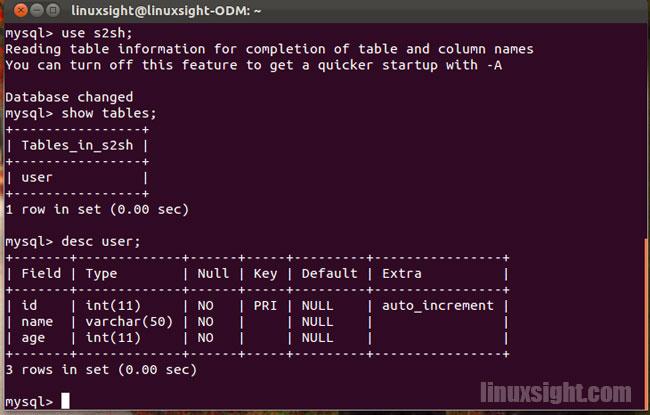
1 准备数据库。由于用到了hibernate,自然少不了数据库,我们这里建立一个简单的表以做演示,ubuntu下的mysql我们已经安装好了,用户名root,密码123456。
把s2sh.sql放到/home/linuxsight目录中
linuxsight@linuxsight-ODM:~$ pwd
/home/linuxsight
linuxsight@linuxsight-ODM:~$ mysql -uroot -p123456 < s2sh.sql
s2sh.sql
create database s2sh
character set 'utf8'
collate 'utf8_general_ci';
use s2sh;

CREATE TABLE `user` (
  `id` int(11) NOT NULL auto_increment,
  `name` varchar(50) NOT NULL,
  `age` int(11) NOT NULL,
  PRIMARY KEY  (`id`)
) ENGINE=InnoDB DEFAULT CHARSET=utf8;

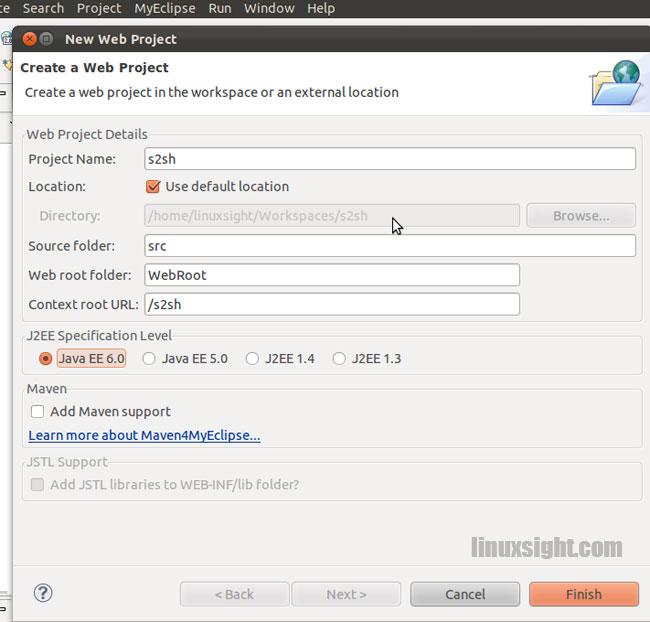
2、MyEclipse9.1已经提供了快速搭建struts2+spring+hibernate的功能。所以本次利用MyEclipse9.1来搭建环境而不是手动。对于版本号,那就是struts2.2+spring2.5+hibernate3.3,如果你想使用框架的最新版本,那就需要手动去增加JAR包了。
新建一个web项目
在项目右键--Myclipse--添加框架的支持
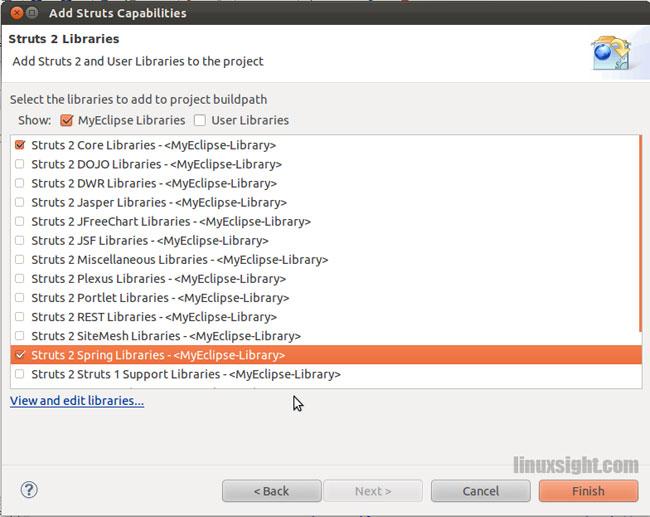
添加struts2支持

除了选择core包,记得把spring也勾选上
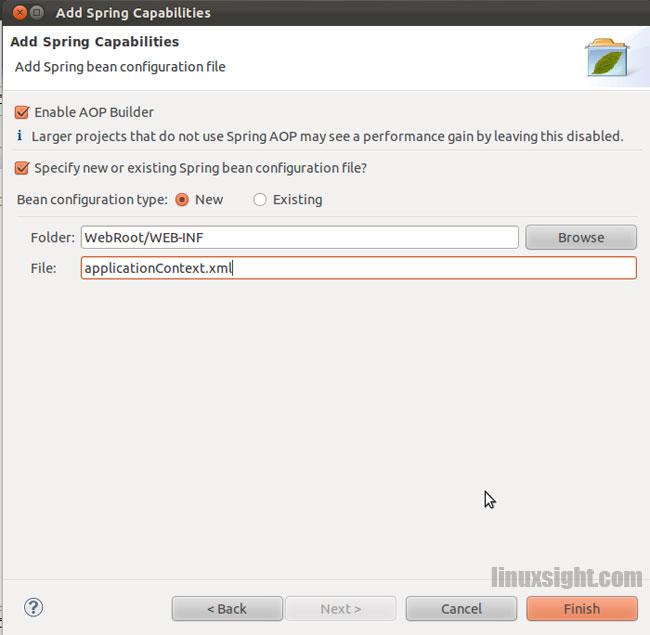
添加spring2.5支持,选择前面4个包。
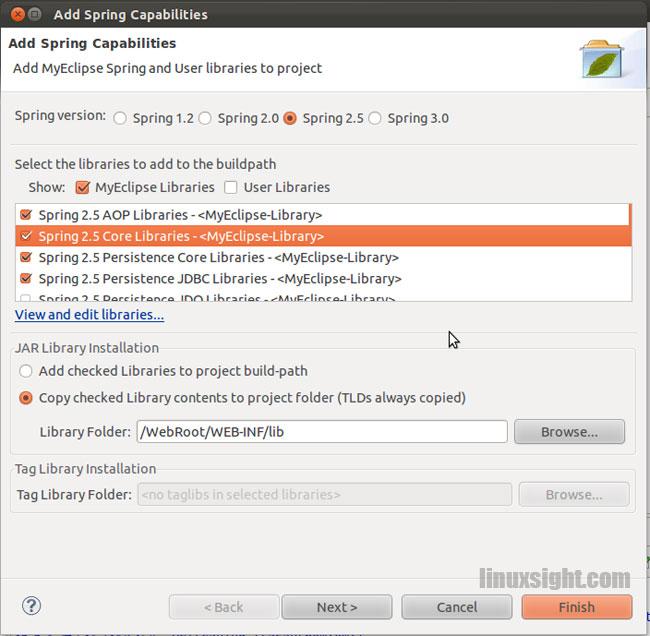
把applicationContext.xml放在WebRoot/WEB-INF
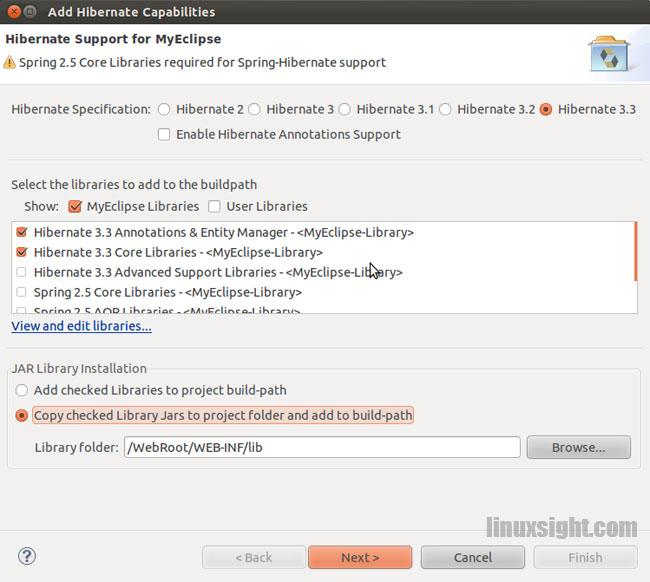
添加hibernate3.3支持
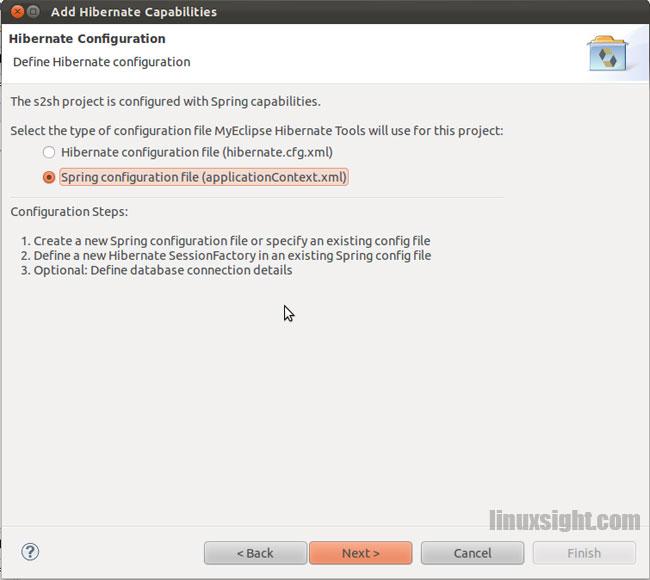
交给spring来管理
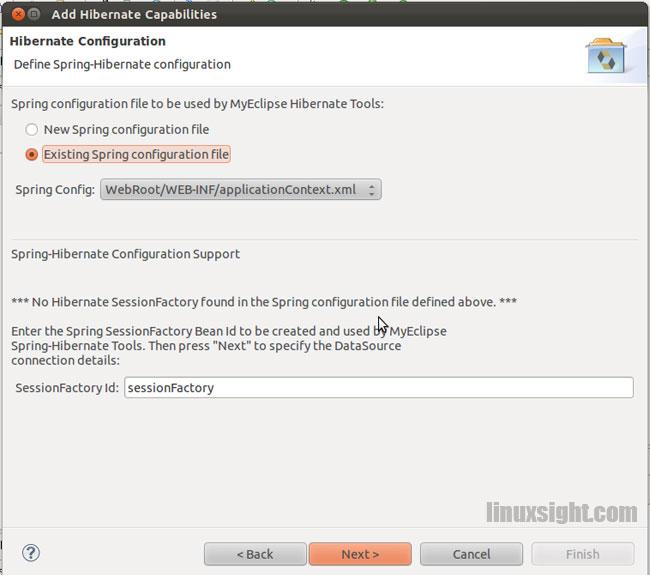
选择存在的配置文件 applicationContext.xml
3、web.xml添加整合spring的<listener>以及struts2的<filter>
web.xml
<filter>
<filter-name>struts2</filter-name>
<filter-class>
org.apache.struts2.dispatcher.ng.filter.StrutsPrepareAndExecuteFilter
</filter-class>
</filter>
<filter-mapping>
<filter-name>struts2</filter-name>
<url-pattern>/*</url-pattern>
</filter-mapping>
<!-- 整合spring -->
<listener>
<listener-class>
org.springframework.web.context.ContextLoaderListener
</listener-class>
</listener>
</web-app>
4、MyEclipse已经生成了许多代码,注意这里连接数据库所设置的编码写法,可以解决乱码问题,当我们在所有页面及配置文件统一好编码,是不需要任何乱码过滤器的。
applicationContext.xml
<bean id="dataSource"
destroy-method="close">
<property name="driverClassName" value="com.mysql.jdbc.Driver"></property>
<property name="url" value="jdbc:mysql://localhost:3306/s2sh?useUnicode=true&characterEncoding=UTF-8"></property>
<property name="username" value="root"></property>
<property name="password" value="123456"></property>
<property name="maxActive" value="100"></property>
<property name="maxIdle" value="30"></property>
<property name="maxWait" value="500"></property>
<property name="defaultAutoCommit" value="true"></property>
</bean>
<bean id="sessionFactory"
class="org.springframework.orm.hibernate3.LocalSessionFactoryBean">
<property name="dataSource" ref="dataSource"></property>
<property name="hibernateProperties">
<props>
<prop key="hibernate.dialect">org.hibernate.dialect.MySQLDialect</prop>
<prop key="hibernate.show_sql">true</prop>
</props>
</property>
<property name="mappingResources">
<list>
<value>com/linuxsight/vo/User.hbm.xml</value></list>
</property>
</bean>
5、POJO的映射文件及类都可以靠MyEclipse生成。
User.hbm.xml
<?xml version="1.0" encoding="utf-8"?>
<!DOCTYPE hibernate-mapping PUBLIC "-//Hibernate/Hibernate Mapping DTD 3.0//EN"
"http://hibernate.sourceforge.net/hibernate-mapping-3.0.dtd">
<!--
Mapping file autogenerated by MyEclipse Persistence Tools
-->
<hibernate-mapping>
<class name="com.linuxsight.vo.User" table="user" catalog="s2sh">
<id name="id" type="java.lang.Integer">
<column name="id" />
<generator />
</id>
<property name="name" type="java.lang.String">
<column name="name" length="50" not-null="true" />
</property>
<property name="age" type="java.lang.Integer">
<column name="age" not-null="true" />
</property>
</class>
</hibernate-mapping>
User.java
package com.linuxsight.vo;

/**
 * User entity. @author MyEclipse Persistence Tools
 */

public class User  implements java.io.Serializable {
    // Fields

     private Integer id;
     private String name;
     private Integer age;
    // Constructors

    /** default constructor */
    public User() {
    }

    /** full constructor */
    public User(String name, Integer age) {
        this.name = name;
        this.age = age;
    }

    // Property accessors

    public Integer getId() {
        return this.id;
    }

    public void setId(Integer id) {
        this.id = id;
    }

    public String getName() {
        return this.name;
    }

    public void setName(String name) {
        this.name = name;
    }

    public Integer getAge() {
        return this.age;
    }

    public void setAge(Integer age) {
        this.age = age;
    }

}
虽然说不能太过依赖开发工具,但当我们熟悉了,可以为我们节省一些时间。
下节继续